The creative journey....


Wednesday, 27 May 2015

New Beginnings, New Adventures

It has been over a year since my last post and so much has happened since I last wrote. So... we moved to Spain last year and despite a few bumps in the road on the whole it has been a very positive move. So much of what we moved for has started to be realised and we are starting to see, now the dust has cleared, some of the trees. Initially I was not ready to begin to create art again and having a break creatively has helped as I have had time to reflect on my creative journey.
The Three Amigos


I knew there would come a time that I would want to begin my artistic journey again and with little access to printing resources I started to write down ideas which I kept in a sketch book. These scribbles and notes started to develop into little stories and poems which normally formed the base of my lino images.
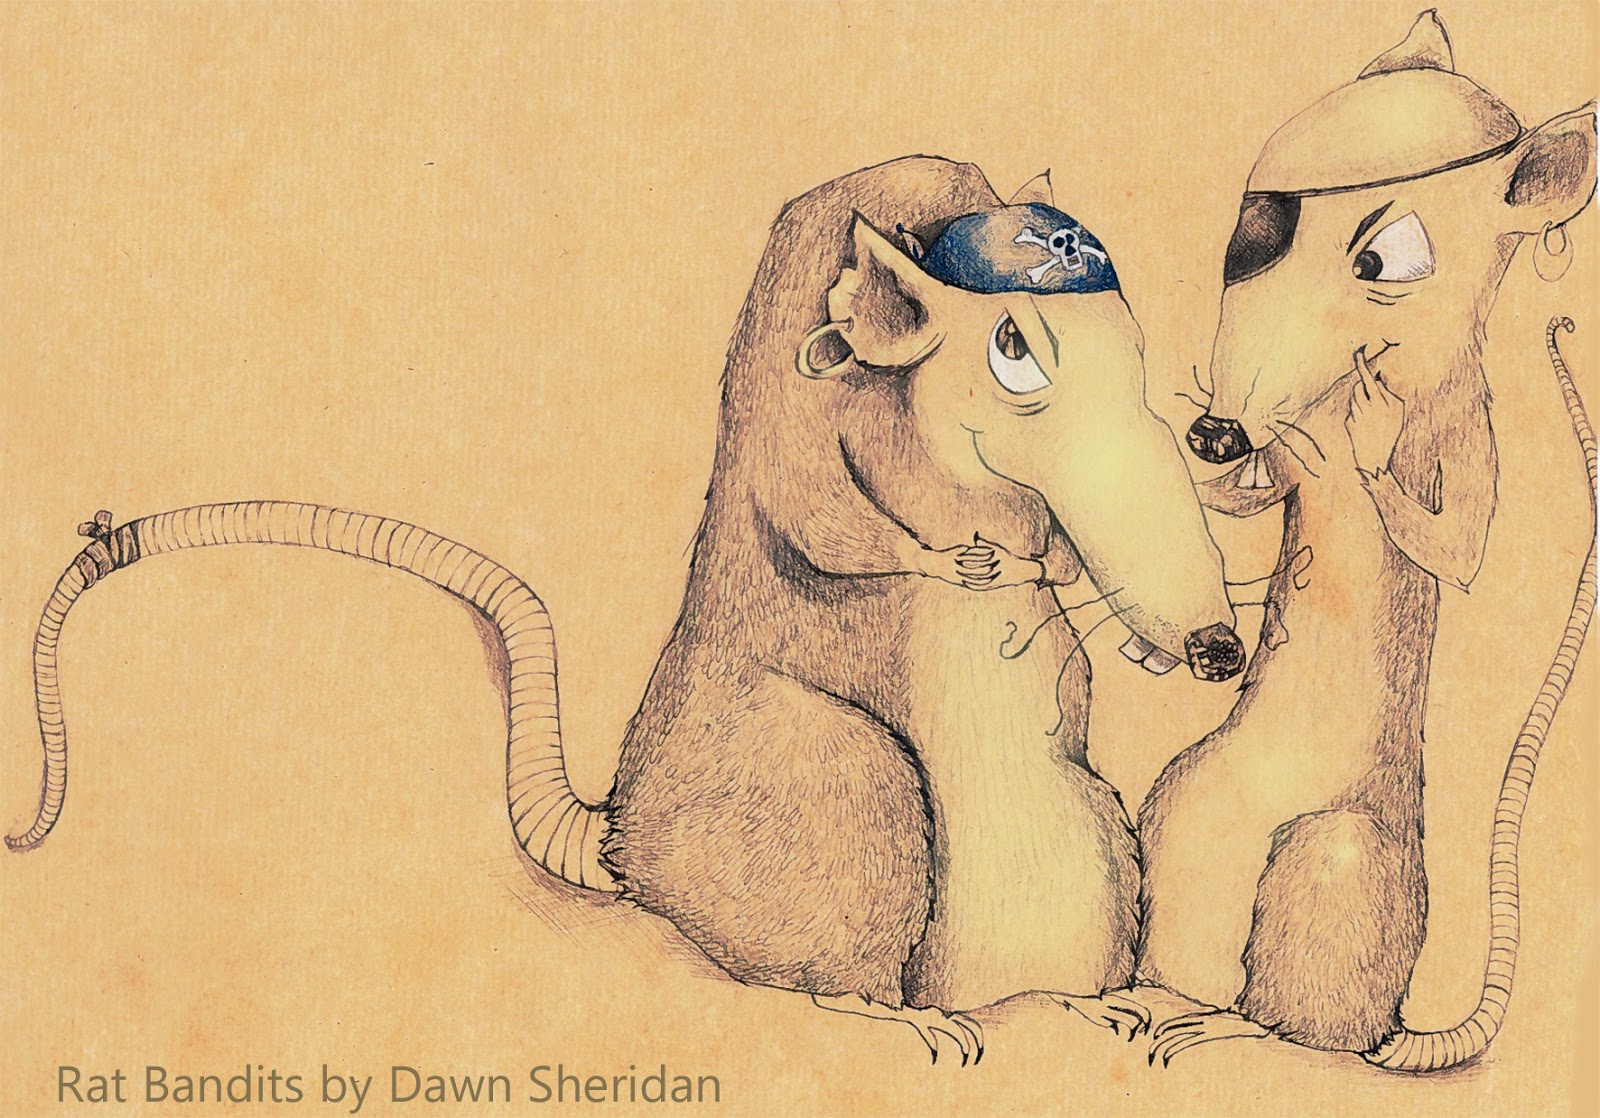
Rufus the Rat Bandit
It felt as though I was saving the images in my words, but the words had a mind of their own and hence my stories were born.  Now the stories are pouring out as fast as Spaniards say Salud! So things change and develop and I am embracing my new life and new opportunities that it has to offer. Besides nothing stands still and I hope that you will enjoy following how I progress creatively over the next year....exciting times ahead!

Would you trust these pesky rats?

Wednesday, 9 April 2014

Personalised Wedding

Personalised printed wedding bunting
Spring is finally here and summer is around the corner....for some it's that time of year when people all over the world tie the knot, get hitched, elope and say I do all in the name of love! 

Yes it's Wedding Season and now more than ever couples want to add that personal touch to that special day. With so many decisions to make and things to plan here are a couple ideas on how to personalise aspects of your wedding.


Not to forget the lucky couple here are some great ideas to create a unique gift list- yes it's in Australia but lots of couples plan honeymoons to the great land of OZ so why not think big...

Champagne Dreams


From helicopter rides over the Blue Mountains to a chocolate indulgence for couples there is something to suit all budgets.... 

Create that gift list with a difference!
For couples who are concerned about ethical and sustainable gifts how about using personalised Jute bags for favours and/or placing table gifts and name placings within them. They are great for filling with toys to keep little hands busy during any speeches.
Available in a range of colours and feature the Love Birds design by Dawn Sheridan. 
This design is also available as cards for invites... visit...http://folksy.com/items/3147086-My-Fluttering-Heart

Folksy have a great feature for the handmade wedding here...http://folksy.com/themes/handmadewedding

Happy wedding planning....


Wednesday, 2 April 2014

Getting your own designs digitally printed on fabric

Ever wanted to take your designs to the next level? Have a fabric project but can't quite find the fabric you want? I'm going to explain how you can do it with basic computer know how with the help of Spoonflower as the fabric provider of choice.

As a printmaker and illustrator I see the benefits of both traditional methods such as screen printed and relief printed images onto fabric but I also appreciate not everyone has access to the facilities to use these methods. For the purpose of this post we are going to look at how this can be achieved by using digital methods.

Firstly, if you have your own image (copyright owned of course) that you would like to use you need to capture the image so that you have a high resolution- this basically means that it is nice and crisp and won't blur if enlarged. I scan mine but some people use photos, but in our British weather is not always possible. OK so here is the 'how to' part....

1- Scan image at 300dpi JPEG or similar file format (I use a local printers they charge a small fee)

2- Using a simple image editing programme such as Adobe or Paint.net is a free one chop off any spare space around the image, delete any small imperfections. If you don't really like using the computer much I suggest before you scan your image use a good old fashion rubber and cut the image to size, then you can skip this bit!

3- Upload the image to the spoonflower website and hey presto- repeat it, mirror it and do what you like using their image editor to get the fabric you want. http://www.spoonflower.com (No I am not getting paid for advertising!)

Here are some examples of the fabrics taken from my lino cut designs and repeated in Spoonflowers website.... Have a go it's easier than you think...


Thursday, 16 January 2014

Digital Printed Fabric

Why Digital?

I wanted to experiment by using my lino cut designs by repeating and reducing the images to create a design for fabrics. Was there a way to get my designs in multi-colour/smaller/larger etc? I could use the lino itself but there are a few factors which influenced my choice. Lino is great for printing one or two images upon fabric after that screen printing is a much more economical process in terms of time and possible errors when wanting to print a large area and meters of fabric. For the best visual design, depending on the size of the lino when using digital you can adapt the design very easily. For example when carving an image which you would like to repeat and turn it will only face one direction and you would have to carve another if you would like the two images to mirror each other.

So I started to explore what other options there are for fabric design. Spoonflower seems popular but I wondered what is out there a bit closer to home and whether Spoonflower is worth all the hype? So far I have found a few companies based in the UK, so it is a limited investigation so far but most quality ones have swatch testing and colour matching, here are the ones I have sampled so far...

Price:

HTS Web Site   Under 10 meters around £31 per meter on Linen not including postage. Over 10meters then it goes down to £23 per meter without postage.
Liberty Press Web Site   Small quantities £23 per meter on canvas cotton includes postage.
Spoonflower Web Site   Small quantities £18 per meter on linen/cotton mix includes postage.

As you can see it is tricky to beat Spoonflower on price, but what about quality?

Quality:

Colour matching- HTS offer the best quality in terms of fabric and best match to my colour design, the Linen is a natural colour and lovely and heavy perfect for cushions. After them Spoonflower were a close second and unfortunately Liberty came a poor last. After a cool wash the Liberty Press fabric was a real disappointment, patchy and faded! The Liberty Press fabric arrived within a day but I won't be ordering more. Such a shame as the Liberty Press site is easy to use and they offer wall paper and scarf design service which I can not pass comment on.

After washing @30 degrees reduced spin cycle-Liberty Press- Left side.
Compare that with the quality of what you can achieve by hand, even after washing it is light fast.
Lino relief printing

OK so you could hand wash the Liberty Press fabric but it still can't compare to hand printing.

If you like the idea of using a British based company and are going to order several meters of fabric then HTS would be a good starting point, with good customer service and quality fabrics, if however you only want a meter or so then Spoonflower is a great option if you are in no rush for the fabric as it takes 3 weeks minimum to arrive to the UK.

I never realised how complicated it would be just to get my designs onto fabric, there are lots of types of printed fabric and as a savvy customer I like to know my options! You really need to have an idea of the types of printing that is available, this page was helpful in developing my understanding... Types of Digital Printing:  I think as digital printing develops it will become more readily available to the end user but as for now it really is only affordable in the UK on larger quantities. 

So for me Spoonflower came out on top but I think, after all the best results for me, in terms of colour and fastness has to be using the Lino directly! Full circle! I think I will be having a go at screen printing also so I will keep you posted on my results. I have just found a gorgeous heavy Russian Linen so I can't wait to print on that :) Here are samples of my hand printed cushions...

Please feel free to share your explorations into digital printing...

Thursday, 2 January 2014

Hand Printed Cushions

I hope that you all had a great Christmas and New Year!

A new year a new project for me and my deadline is tight which is one of the reasons I am very cross with myself! What's the saying, "Less haste, more speed!" I don't like negative posts as I am a positive person and negativity is never productive but a problem shared and all that...

A Lesson Learned:

Always Plan Thoroughly!

I have been making hand printed fabric for some prototype cushions and took time to sew the cushions first, adding piping and everything, printed on lovely 100% linen!

Because I decided to make envelope cushions I had a nice thick seam on the back which would cross where the image would be printed. If I had planned and printed first this would have been avoided! I should know better-slaps back of the hand! Well, in reality I can make another and mistakes are there to be learnt from but time lost I can't get back. Hopefully others can learn from my mistake!

unacceptable uneven image
On the upside I was able to print some other images onto fabric... on a natural mixed cotton:
3 pigeons in plum


Watch this space as I will be printing more of the Red Doves until I am completely happy with the result.

Tuesday, 19 November 2013

Handmade Lampshades 30cm Drum

Unique Bespoke Hand Printed Lampshades

I have been printing and designing on fabric with my linocut designs and wanted to use my own hand printed fabric to make a lampshade. Having searched the Internet it was becoming pretty clear that making lampshades is a very guarded affair. I'm not totally sewing illiterate but there are certain specifics which really help when venturing into making your own bespoke lampshade. So I hope this blog post gives you some useful tips when getting started...


YOU WILL NEED:

1) Lampshade parts- either bought separately or in a kit via Need Craft/Amazon
2) Fabric of your choice- at least a meter long for a 30cm drum shade.
3) If you have a fabric which frays I recommend a binding webbing tape which can be bought in all colours and sizes- it's not an actual tape but lovely woven strips of cotton for seams.
4) Fabric glue- general purpose is fine.

Notes on fabric choice...
I chose a natural cotton canvas fabric and linen.  Beautiful to print on and you can use oil based printing ink which when dry is permanent. If it is your first lampshade go for a basic pattern as you could find difficulties when cutting straight lines and matching up the seams and fabric direction- start simple at first.

SEE PREVIOUS BLOG POST ON PRINTING THE FABRIC, ensure you measure the amount needed which is roughly 100cm in length and 25cm in width.
Ironing the fabric after printing as well as before will help 'cure' the ink.

When you have printed the fabric ensure your design stays within the allocated measurements for the lampshade allowing for seams and when it is dry you are ready to add the self adhesive backing which comes with the kit- there are other ways to make your fabric rigid but the PVC backing provided is really strong, fire retardant and easy to use.

TIPS
*If like me and don't do straight lines very well or in general draw on the back of the fabric a straight line so that when you roll out your backing it will stay straight and not go 'wonky!'

*Tape your fabric to the table so that when you stick on the backing it won't curl up.

*If your fabric frays once you have cut it to size paint a thin layer of PVA on the edge to minimise the fraying.


If you can not see where your design is when adding the backing fold the fabric until you can see your design and fold, this will leave a visible crease in the fabric that you can make sure you cover with the backing.


When backing is added the fabric is rigid and extremely durable. Smooth and make sure there are no creases in the fabric. If you buy a kit it gives you instructions on how to add the tape and the metal rings, it gets a little awkward adding the rings but not too bad.

This is the part that can make the lampshade look really high quality and well finished...The hand rolled edge and neat seams.

I add the webbing tape along the hand rolled edges as it adds a really lovely and neat finish along the seams. Using the double sided tape and glue on the inside it is a great way to attach the binding tape and looks great when finished.
Before the binding tape was added.
The finished lampshade: This is listed in my Etsy and Folksy shops:
https://www.etsy.com/uk/listing/168623695/handmade-hand-printed-lampshade?ref=shop_home_active


Personalised lampshades:

Monday, 11 November 2013

Hand Printed Fabric- Relief Printing

Block Printing on Fabric Update:


I have been using my lino print designs to print directly onto fabric. Cotton and linen in it's natural form looks great combined with the images and prints really well. I wash the fabric first to remove any anti-creasing coatings that can be on the surface of the fabric.

Before printing iron the fabric (linen is notorious for creasing so use plenty of steam!) It looks like I haven't bothered in the photo but believe me I did! More ironing once the ink is dry! Typically my iron has never seen so much action so now has decided to give up!

Having tested the permanency of the oil based inks on the fabric by leaving the ink to dry, ironing and then putting through the dryer for 10 minutes it has survived the washing machine test at a 40 degree wash.

Speedball do an ink especially for block printing onto fabric currently available at Intaglio Printmakers in London. Added to my Christmas wish list!

The Fish Tea Towel coming soon to my Etsy shop:
Tea Towel is a big as my son! Arms up son!

Next blog post will give you a sneak peak into my lampshade making tips from hand printed fabric...

Thanks for reading :)

Sunday, 10 November 2013

The Great Cornish Food Book

A new book showcasing the brilliant cuisine that Cornwall has to offer. Includes some of Cornwall's best local produce and where to find them. I had the privilege of being part of this great project producing the illustrations for the book. If you would like to find out more or grab your own copy they are being stocked locally or you can purchase them online via the Cornish Food and Drink website.

See link below:

Wednesday, 6 November 2013

How To Make Hand Printed Wax Bunting

Things you will need:

* Wax Pellets- available online at good old Amazon.
* Paper about the thickness of cartridge or something similar.
* Ink (I'm using an oil based but you can use water based)
* Lino/vinyl and cutters
* Rollers
*Something to burnish the print- spoon or barren.
*Old Tin/pan
These are just my suggestions it you find a better way then please share :)

That's the way to do it: Christmas Bunting...

1) Begin by drawing and carving your design that you would like to print. Each flag on my bunting measures about 14cm square.

2) Once you have decided and mixed your colours you can begin rolling out evenly and applying an even layer to the linoleum.
 
Do you like my chopping board?

3) Place the paper on top of the lino or vinyl and if you don't have a press or one of these...( a car jack press)

 then something like this will do; spoons, disc barren or even a heavy smooth object like my glass candle can work a treat...


A Note on Paper for bunting- I wanted to use as thin as possible but having tried rice paper once the wax was applied I found it folded easily resulting in cracks in the wax. I bought some recycled A4 paper which still has slight transparency about it whilst being thick enough to produce a more robust result.

4) A bit of elbow grease later...
5) Waxing:
I melt wax pellets on my hot plate! (Very glamorous!)  Yes in an old baking tin, it's shallow enough so I can melt a little at a time...
It's worth mentioning when I cut the images ready for hand waxing I leave surplus at the bottom edge and a little paper corner as a handle- then there is no need for tongs and the little drips that collect at the bottom can be tidied up once dry by cutting off.  I found painting the wax on very messy and not an even result, therefore DIPPING  the image into the wax gives a lovely even coat with very little mess.
If the wax is too hot it will re-open the ink and cause it to smudge, too cool and it will not coat the paper properly, it's a bit trial and error so best test with a scrap piece first. If you don't have a hot plate you can use a wax melting pot which is specially designed for this job, I tend to turn the hot plate on and off so it doesn't over heat- obviously I recommend using something especially designed for melting wax- but I have to say that for safety reasons! ;) Please stay safe!

I use the brush to dab the image to ensure it is fully submerged in the wax and have grease proof paper next to the tin so once the wax finishes dripping you can place the newly waxed flag down to finish drying.

So there you have it, I hope this inspires you to have a go at making your very own unique waxed bunting, now where's the mulled wine and minced pies!


These images are also available as Christmas cards in my Etsy shop. Over the next few months I will be developing my designs onto other items such as fabric so I will try and document my progress. Wish me luck and thanks for reading,
Happy Printing

Dawn Sheridan :)

Wednesday, 3 April 2013

New Design Work

Recently I have been asked to do a couple of designs for specific products. Since leaving teaching I have mainly fulfilled my own creative direction and rarely considered myself as an artist let alone designer.

Luckily for me I've discovered I actually really enjoy designing and it's been a new way for me to explore other creative directions.

It is such a great feeling when the client is really thrilled with the design and so I hope that this is just the beginning of a new branch in my creative portfolio!
Design for Cornish handmade @Buddylove Dog treats


If you would like to discuss any design projects please feel free to contact me either through my facebook page or via email. Thanks at 
https://www.facebook.com/sheridanart?ref=hl
sheridan.dawn@rocketmail.com

Wednesday, 20 March 2013

Latest work- HAPPY EASTER

I have three chickens in my garden and thankfully they started laying again. I missed their lovely fresh eggs everyday. Now available in my online shops. Happy Easter everyone :)

Monday, 17 December 2012

Exhibition and new work at Truro Arts Cafe

Christmas exhibition for those who would like to purchase my work over the holidays. There are new prints from the Peacock Plume in silver and plum to my lovely cockerel collagraph all framed for the first time!
Merry Christmas Everyone :)

Sunday, 16 December 2012

Apologies for absence, I've been creating new work!

Firstly I suppose I must explain my absence from my blog! I have been busy designing art and have my very first exhibition in Truro. I sometimes find time away from the computer helpful when I need to be creative as it can be a big distraction. So what have I been doing? Mainly linocuts and one series of prints I am particularly excited about are the ones derived from a short story:
The Peacock and the Moon...
To see my current exhibition visit The Truro art shop/cafe next to the museum.
More updates soon...

Monday, 4 June 2012

Elephant collagraph

A playful print, simply made.

I am very excited this morning as I am hoping that the press that my farther-in-law has made with a car jack will work!

Thursday, 5 April 2012

New Lino Print

Mice in Cornfield:

I had the opportunity to print on an old book press today, with a great space to work and hang my prints. This week has been a rare opportunity to do nothing but printing thanks to my lovely husband who has been 'daddy day care'. So here is one of the new prints created this week...soon to be listed in my Folksy shop;

How to make a simple collagraph (part two)

Wow I should rename this blog post- 'How to combine art and a workout!'...

Once the image is dry the next stage is to add the colours that you want. Be prepared to use a lot of etching ink as the rough surface literally drinks it! Then follows your workout.. 1 and 2 and ...wiping the matrix clean.
I added further ink (red and gold) 'on top' with a roller as you would when printing in relief.
The matrix inked and ready to print.


And here he is.... I won't be able to print another like him so he is unique!

Wednesday, 4 April 2012

Collagraph Cockerel Progress...

I am currently exploring ways to add texture as well as colour to my prints in the form of a Collagraph. It sounds a very fancy name doesn't it? But it is something very simple to do. 
Through the use of Collagrah  (gluing materials to a matrix ) there are endless opportunities to create texture and tone. I am particularly interested in producing a fine line print similar to a drawing and combining it with dense textured areas.

First i used a thick piece of card, drew the image and then surfaced scratched the drawing with a sharp pointed tool a dart is useful for this if no etching tool is handy! I then painted with PVA glue and sprinkled it with a fine grit called carborundum. (Very similar to fine sand. A great word though, I dare you to say that fast three times!)

The varying tone is only the different coloured grit i used, graded from coarse to fine which also creates tone when inked. (This then needs to dry overnight)

 
The next step is to add a sealant such as shalack (I think that's how it's spelt) or varnish which seals the matrix. You need wet paper to make the print, if you don't seal the matrix the PVA will become tacky again in the press = disaster!!

The matrix sealed with a brown coloured shalack.

I am printing this image tomorrow so I will keep you posted with the results...

Tuesday, 27 March 2012

Doodling in the sunshine.

Nothing beats sitting outdoors on a sunny day with a sketchbook and pencil in hand. It feels like summer today and not a cloud in the sky.


With the odd insect having a browse at my sketchbook and the sound of the chickens clucking now and then the page soon filled up and I was away in a corn field before I knew it...
Design for new lino

Friday, 16 March 2012

Tuesday, 13 March 2012

New work- Inspiration behind the owls...

New Lino Print
When I first had children I felt like a night bird, during the baby stage, days and nights seemed to merge. The owls for me, seem to capture those special moments that mums know so well, even when you are so tired there is nothing like a good old snuggle...

If you wake while I am gone,
Just call my name I'll hear your song.
Hush little baby don't you cry,
For I will sing you a lullaby.

Soon to be in my Folksy shop...